I love going place with friends… that’s fun, of course. But I also like going places alone. I like driving, I don’t mind the solitude, and Henry of course is a bit more focused on ME when he doesn’t have any friends with him.
Last weekend I went to Houston for a jump lesson, and I’m going again this weekend.
Then the weekend after that is XC schooling.
Then the weekend after that is an indoor eventing thing. I’m intrigued by this concept, so I must go try it myself.
After that I need a dressage lesson (although look at all the other options that weekend…)
because next up on the docket there’s an eventing derby, which I’m pretty excited about
Here’s a hint as to why. Eventers will get it.
and a Combined Test the weekend after.
It’s kind of amazing how many things I can do now. I made a master list of every event, combined test, derby, schooling h/j show, schooling dressage show, open schooling, etc for the year within a 4 hour drive and it’s literally a 6 page Word document. SIX. That’s 6 pages full of things to choose from in whatever way my little heart desires.
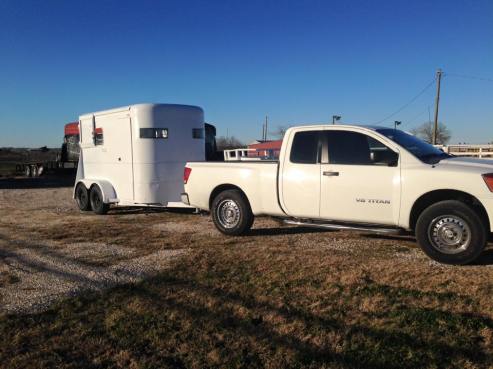
Henry is a great traveler and I figure since we are only going to do one or two recognized events before Coconino, getting as many cheap miles as possible isn’t a bad idea. Especially right now when the weather is nice (the entire 10 day forecast is 73-83 degrees), because we all know how fast that can change. We shall go forth and conquer all the things and hopefully come out more seasoned on the other side.
When you’re suddenly handed the world and a bajillion different options, how do you choose what to do? Obviously budget is the limiting factor, but what about beyond that?
(and yes, you just got Zoolander’d and Aladdin’d all in the same post)
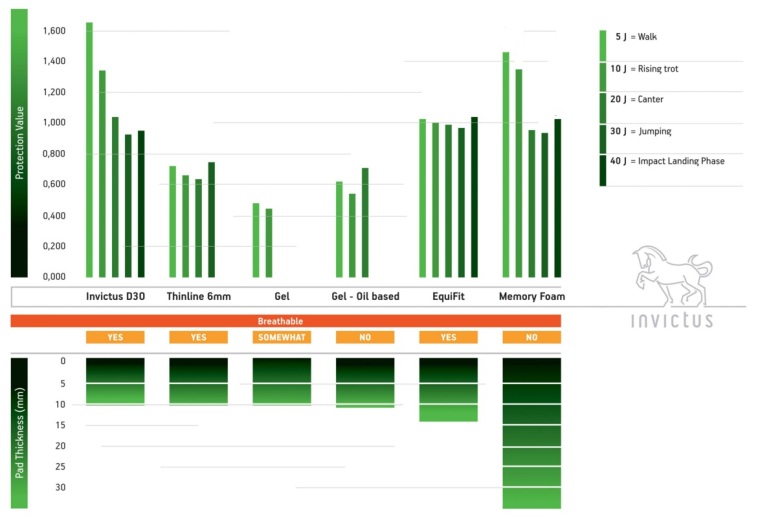
While standing in the booth at AETA watching the video for the Invictus pad, they flashed a pretty interesting graph. This one, to be exact:
Here’s the entire blurb from the Invictus website about their results (super complimentary of themselves, of course, but if you can set that aside the science is interesting):
We conducted the tests starting with 5 Joules of impact energy to determine the Peak Transmitted Force through the protective layers. (PTF is the pressure that can be felt through a material.) The impact energy was increased in 5J increments to a total of 40J. We show on the right side of the graph how we assign the impact energy in the tests to pressure that is felt under saddle. Pads, which reached maximum PTF at a given energy, were eliminated from further testing, because they could offer no further values. The tests were conducted under EN1621 tests standards.
In the range from 5J – 25J, the tested pads recorded from 123% to 329% more PTF (Peak Transmitted Force) than Invictus
In the range from 25 – 40J – the tested pads recorded up to 123% more PTF than Invictus
Our tests show that, while high quality memory foam pads like Ogilvy® and the Equi-Fit pad provide good protection at all energy ranges, both are considerably thicker and only conditionally breathable. This translates into diminished contact and a less than ideal heat/moisture balance. The Invictus pad showed the overall best protection values with the least displacement, convincingly delivering on all points, from superior all-round performance to ergonomic and sleek design.
Gel – both oil-based and regular – as well as the Thinline® material cannot come close to providing sufficient protection at the same thickness. Water based gel only performed to 20J before bottoming out. Oil-based gel did a little better, but also only showed low protection values and dropped out at 30J. Thinline tested a little better to 40J impact energy but it can’t come close to the standards of the Invictus D3O® XT Mesh with intelligent molecules.
This kind of information is far more interesting (and helpful) in my mind than things like The Truth Tack Review lady who likes to test impact protection by dropping a bowling ball on things. That irritates me. A lot.
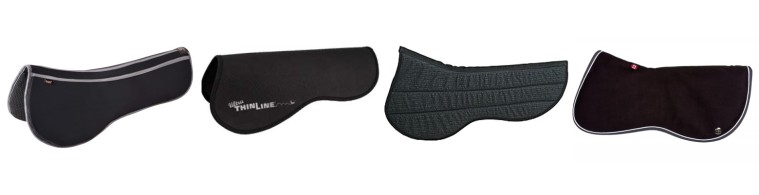
Half pads are one of those items that people always seem to have strong opinions about and even stronger preferences for. Some people will argue for Thinline until they’re blue in the face, and the same for Ogilvy. Or the reverse – those who absolutely hate a certain pad with a fiery passion. If you’ve ever been to a horse message board, you’ve seen it.
I personally used Thinline for years and had no complaints, then decided to try Ogilvy. Henry the princess said that he preferred the Ogilvy (which should surprise exactly no one) so that’s what I’ve stuck with. I have no passionate feelings either way, personally.
Pony says what Pony likes. I obey Pony.
Side note: wouldn’t it be nice if some tack shop set up a half pad trial program so you could demo several different ones? How do we make that happen? They do it for bits and stirrups so surely half pads wouldn’t be much different. I digress…
I have always wanted a comparative study between the different pads, so the Invictus one has got me pretty fascinated. Mostly because of two main things:
It makes the Invictus pad look pretty intriguing (of course) especially for those that don’t have a saddle with enough extra width to accommodate something thick like the Ogilvy.
Memory foam seems to offer way more impact protection than I might have thought. I mean… Henry’s positive reaction to the pad told me that he preferred it, but seeing numbers to back up my own personal observation is captivating. I want to see more. Also interesting that the Equifit didn’t perform all that differently considering how much thinner it is than the Ogilvy.
So, half pad users, what say you? What do you think of this study and it’s results?
If you want to buy yourself something nice for Valentine’s Day, now’s your chance. Luxe EQ almost never has sales, so this is a rare opportunity to shop their final clearance and Not-So-White selection, with prices up to 75% off. This is the only place you’ll find the list!
Here’s how it works:
For questions or orders, email megan@luxe-eq.com or message Luxe EQ on facebook.
If there’s something you want in the Not-So-White sale, you can post a photo of the item (stock photo is fine) on Instagram with the hashtag #notsowhitesale (make sure to @luxe-eq so they see it) and get free shipping!
All items are on a first come, first served basis. Once they’re gone, they’re gone!
All sales are final.
Please read descriptions carefully – not all photos are of the exact colors available.
Italian sizes are as follows 38IT=24 US, 40IT=26US, 42IT=28US, 44IT=30US
BREECHES
Mastermind Breech Navy/Orange sizes 32, 34(2) originally $280 sale $168
Esperado Ischgl breech black size 24, 26, 28, 30 originally $228, sale $99
Anna Scarpati teal bit breech Italian sizes 38, 40 originally $300 sale $160
Animo Naky breech black Italian size 42 originally $479 sale $200
Animo Nando Jean breech Italian sizes 38, 42 originally $360 sale $150
Animo Nonus breech grey Italian sizes 40, 44 originally $380 sale $99
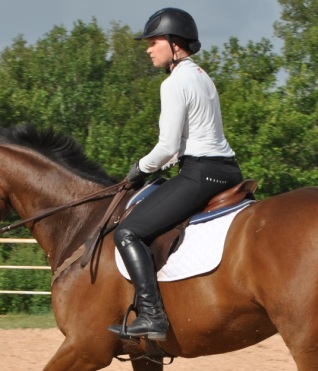
On Saturday I loaded Henry up and made the 4 hour round-trip trek to have a lesson with my former jumper trainer. I rode with him when he was based in Austin but now he’s in the Houston area (which has worked out really well for him, even if I’m pouty about it). I’ve lessoned with him on Henry before but it was about a year and a half ago.
GIANT ARENA
The conversation when I first got on went something like this:
Mark: “Aren’t you getting ready to move up to Training?”
Me: “Hopefully in the fall, I’ve got to work on some things with myself first.”
Mark: “Oh yeah? What’s going on?”
Me: “I can’t ride.”
I went on to elaborate about the million and one things I can’t seem to do right on a consistent basis until finally he told me to just go canter the vertical back and forth to warm up. I didn’t mess that up, so we proceeded to courses. And honestly? It wasn’t bad. I still have those same habits that I can’t seem to ever stop doing (why do I soften my hands and shoulders when I see the long distance? Why do I hold onto my inside rein out of the turns?) and I still need a little help getting the right canter, but otherwise it was kind of decent. I think he even said “good” at one point. Much less of a shitshow than I usually feel like these days.
Henny good!
After we were done I tossed Henry in a stall, unhooked my trailer, and made the short drive further towards Houston to the Great Southwest Equestrian Center to check out the Luxe EQ mobile trailer. I’m pretty familiar with most of what she carries but some of it I haven’t seen in person yet… it’s been about a year since I’ve been in there.
A belt display this fantastic is a big hint about how much amazingness lies inside
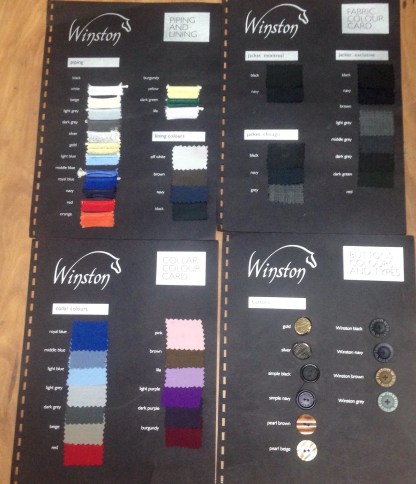
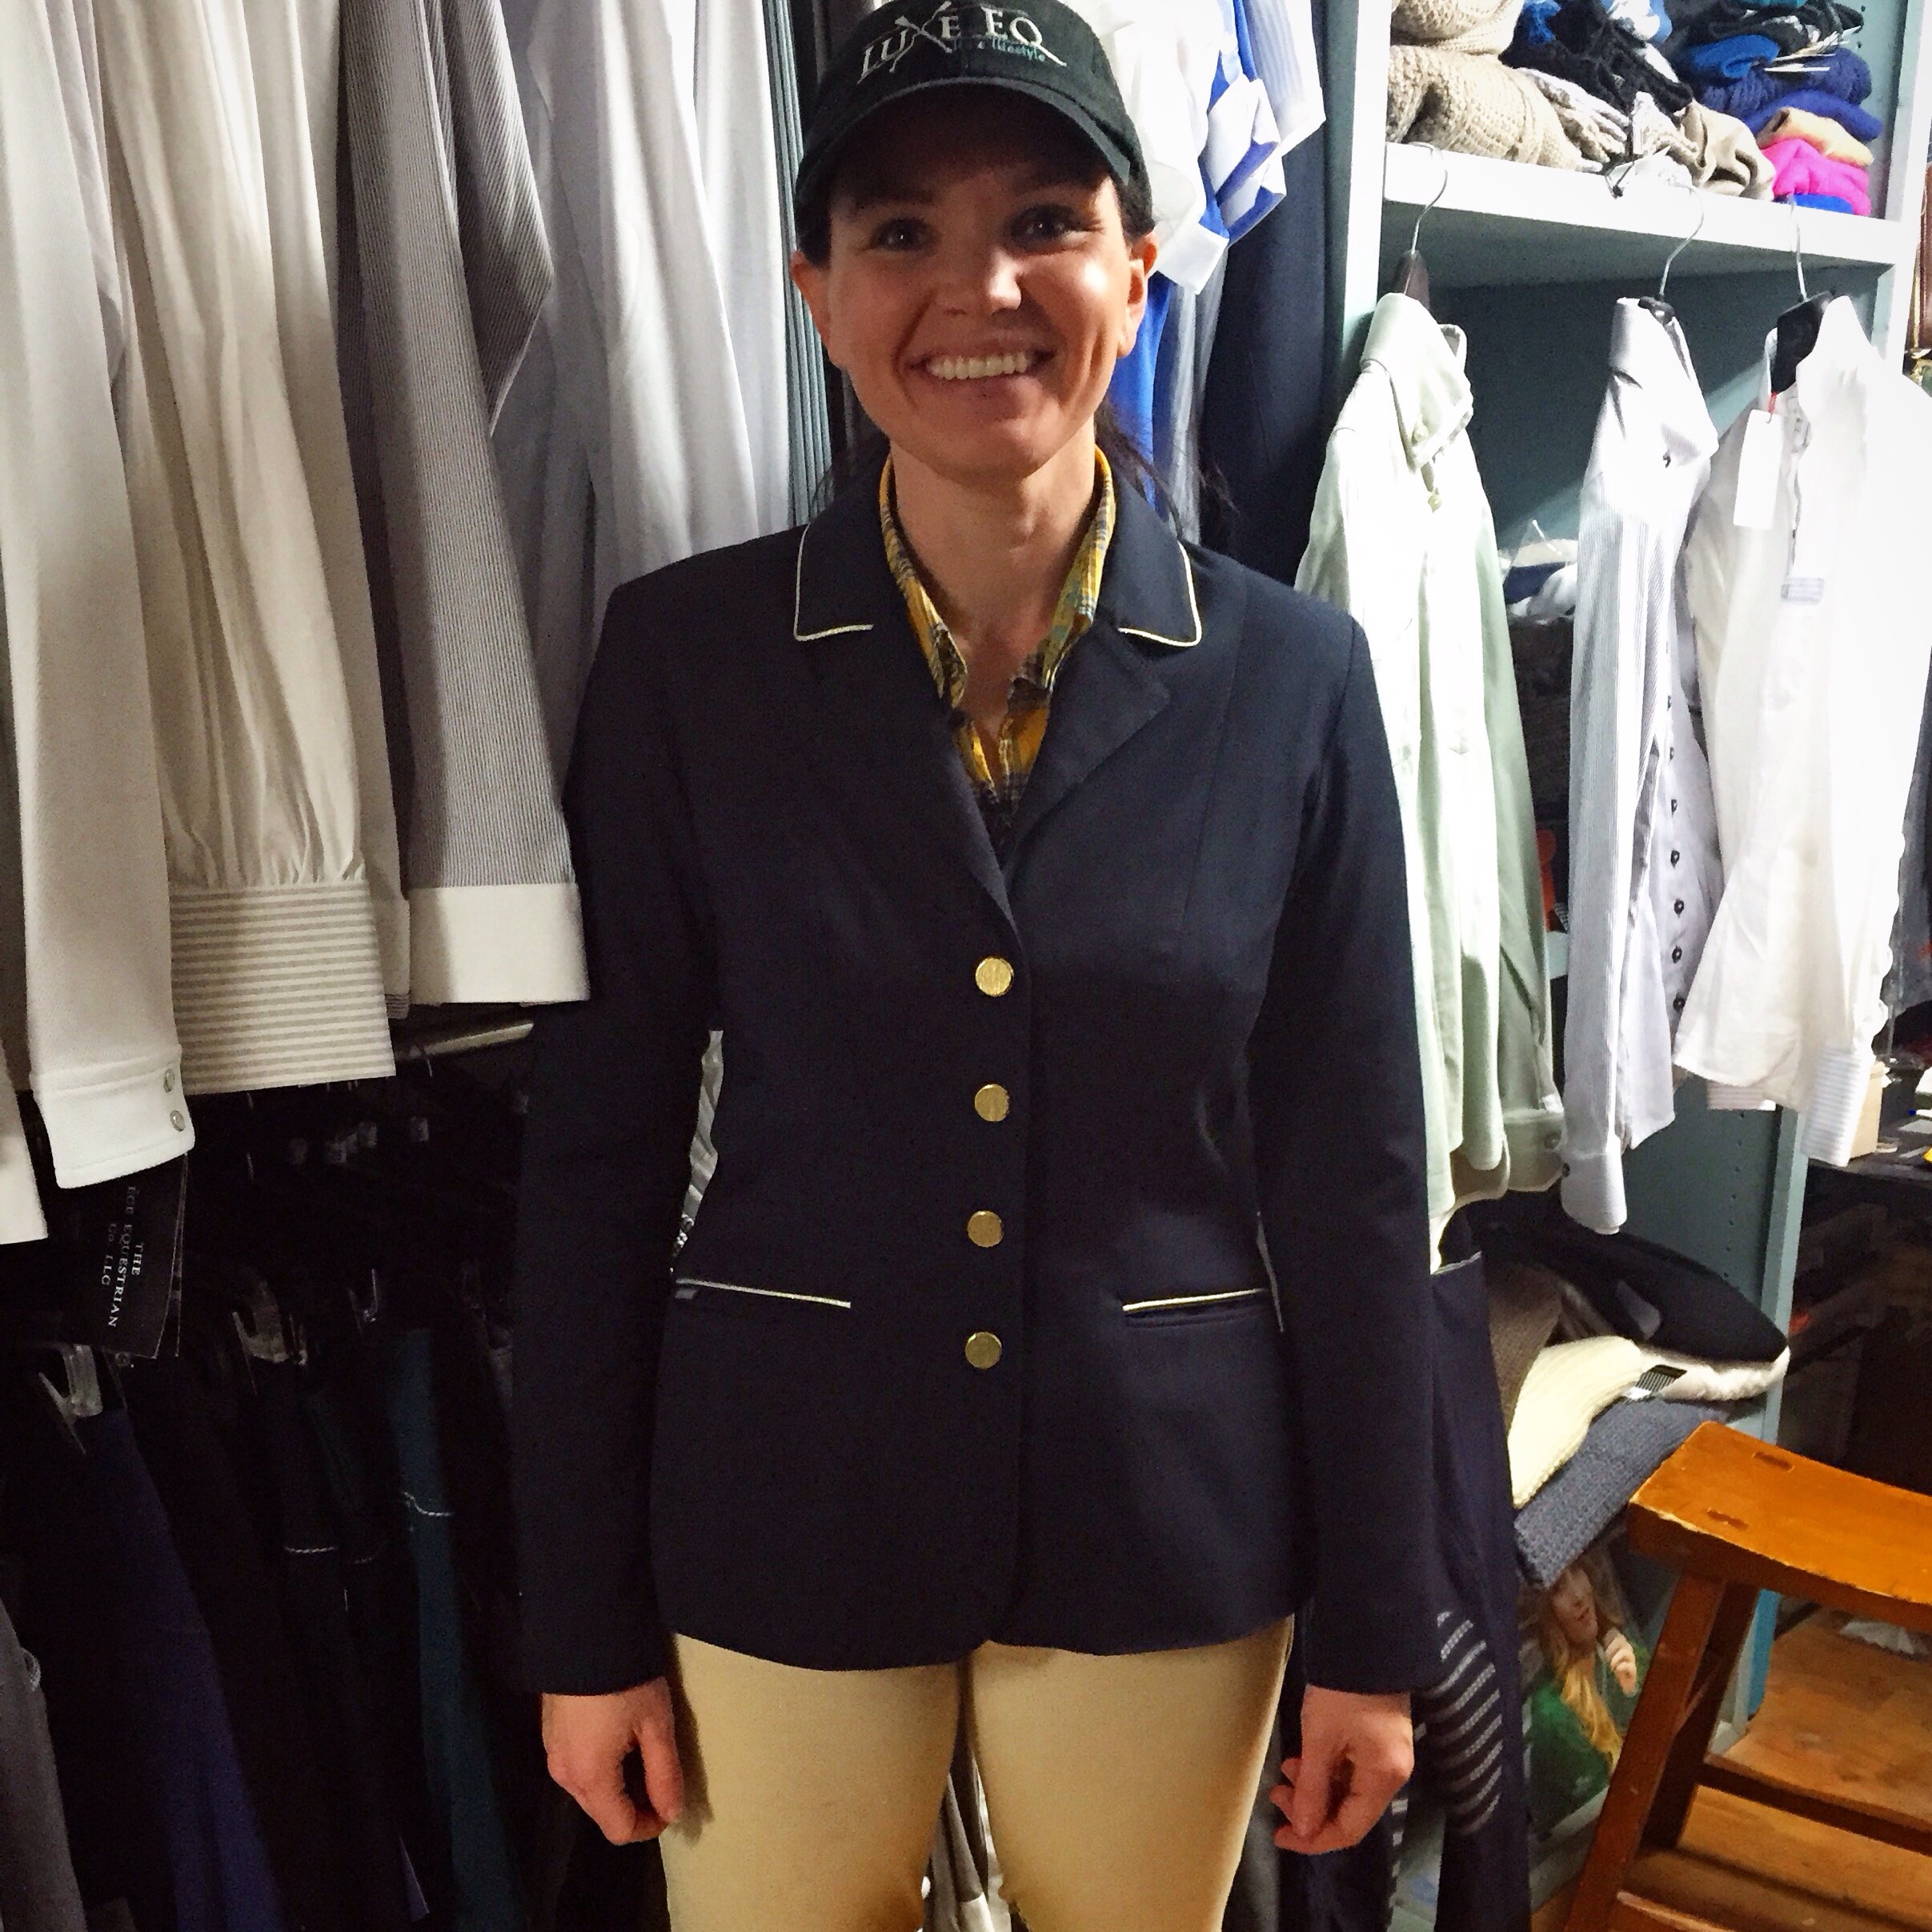
I’m very familiar with most of her stuff (Animo, Le Fash, Samshield, Tucci, TS, RJ, etc) but she’s had a line called Winston for a while, always speaks really highly of it, but I wasn’t very familiar with it. She had me try on a shirt (love) and a jacket (LOOOOVE). I’m not totally sure what happened after that, it’s a bit of a blur, but it involved an order form and these:
The jackets are so nice. And fit so well. And are so classic. And you can customize them. And they can do navy with yellow piping and navy buttons. So, ya know… that happened. But it won’t be here til May so it doesn’t count.
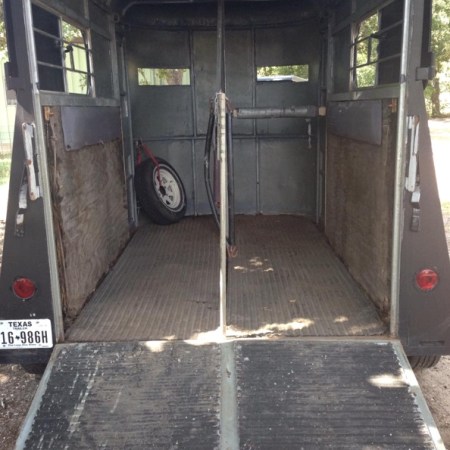
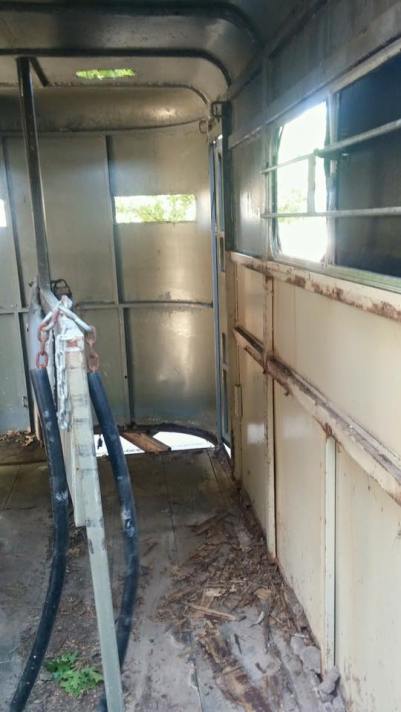
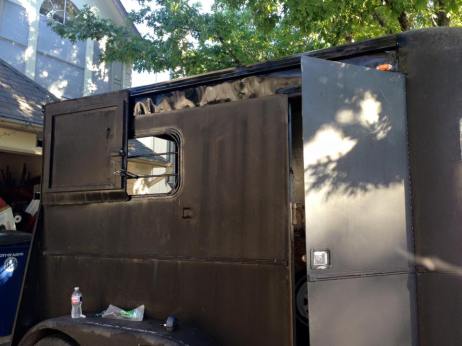
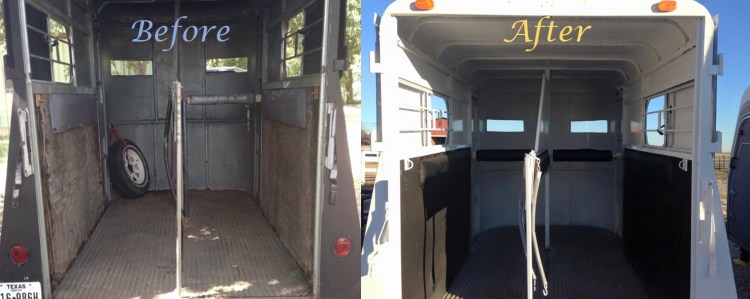
I picked up Betty the trailer from the painter the evening before I left for AETA, so this is the first I’ve actually had time to sit down and put her pictures together from start to finish. Now that the transition from Black Betty to Betty White is complete, it’s time to recap the process.
I bought the trailer from a blog reader/friend for next to nothing. It definitely needed work but had good bones. The layout was exactly what I wanted (I ❤ a 2 horse straight load with a ramp), it had a good floor, was structurally sound, and the lights worked. Ya know… the basics. However, she did need a lot of minor things and aesthetic help.
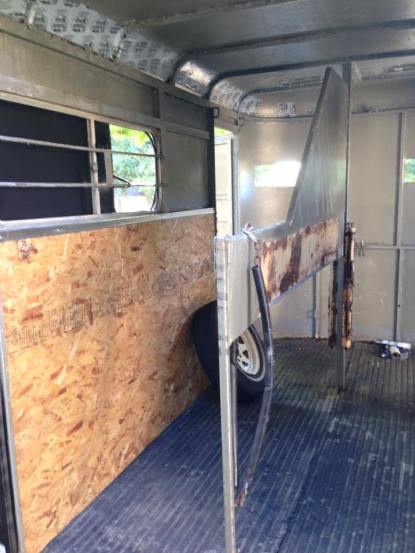
I started by having the roof fixed. There was a lot of corrosion on the sides where the roof met the body (some googling revealed that apparently there was defective roof sealant with several model years of this trailer, so I’m assuming that’s what happened to make it corrode so much faster than any other part of the trailer) and I was given two options: put on a new roof, or patch the sides of the existing one. A new roof was more than twice as expensive, and the corrosion was only on the sides, so patching was the better option for me. The metal guy patched both sides of the roof, some spots along the front, and sealed up the open vent holes in the top. He also fixed and re-ran some sketchy looking wiring, replaced some of the floor in the very front part of the trailer, replaced the wood on the walls, added two new lights, and put plexiglass back into the front windows (it had none).
post-demonew wood and sealed cracks/holespatched roof seams
After that I ordered some new bits and pieces from Horse Trailer Accessory Store, including some reflective tape, a new coupler pin, new pads for the walls and chest bars, etc. I also got new rubber mats to put on the walls over top of the wood, and got 4 brand new fancy wheels put on.
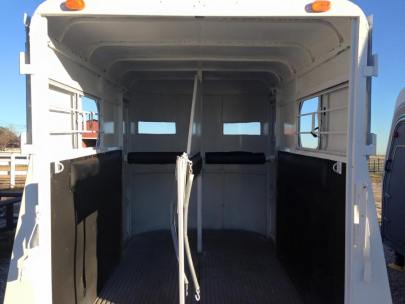
new wall mats, pads, and chest bars
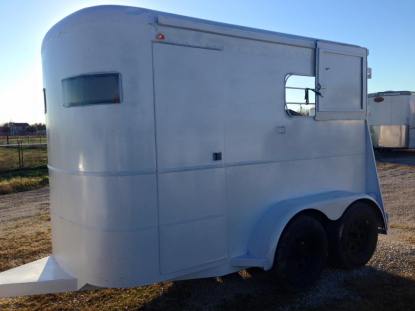
The last major thing was the paint job – I didn’t want to haul Henry around in a black trailer in the Texas heat – so Betty went from black to white.
Now that she’s “done” and totally road worthy, I found a few more little things I want to do (like mount the spare tire to the outside, put new mats on the floor/ramp, and get new butt bars), but those can happen over time. Pretty damn excited to have a basically “finished” and road worthy trailer! Total investment? About $2000. The freedom? Priceless.