The Tail Tutorial

Normally I really hate doing how-to posts because it makes me feel like a little bit of a douchebag, but since several people asked, I’ll show you my process for a tail makeover.

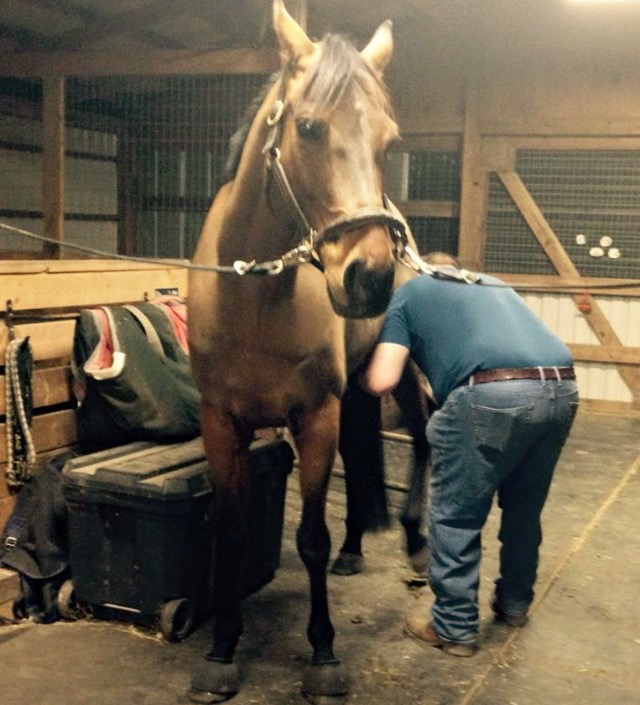
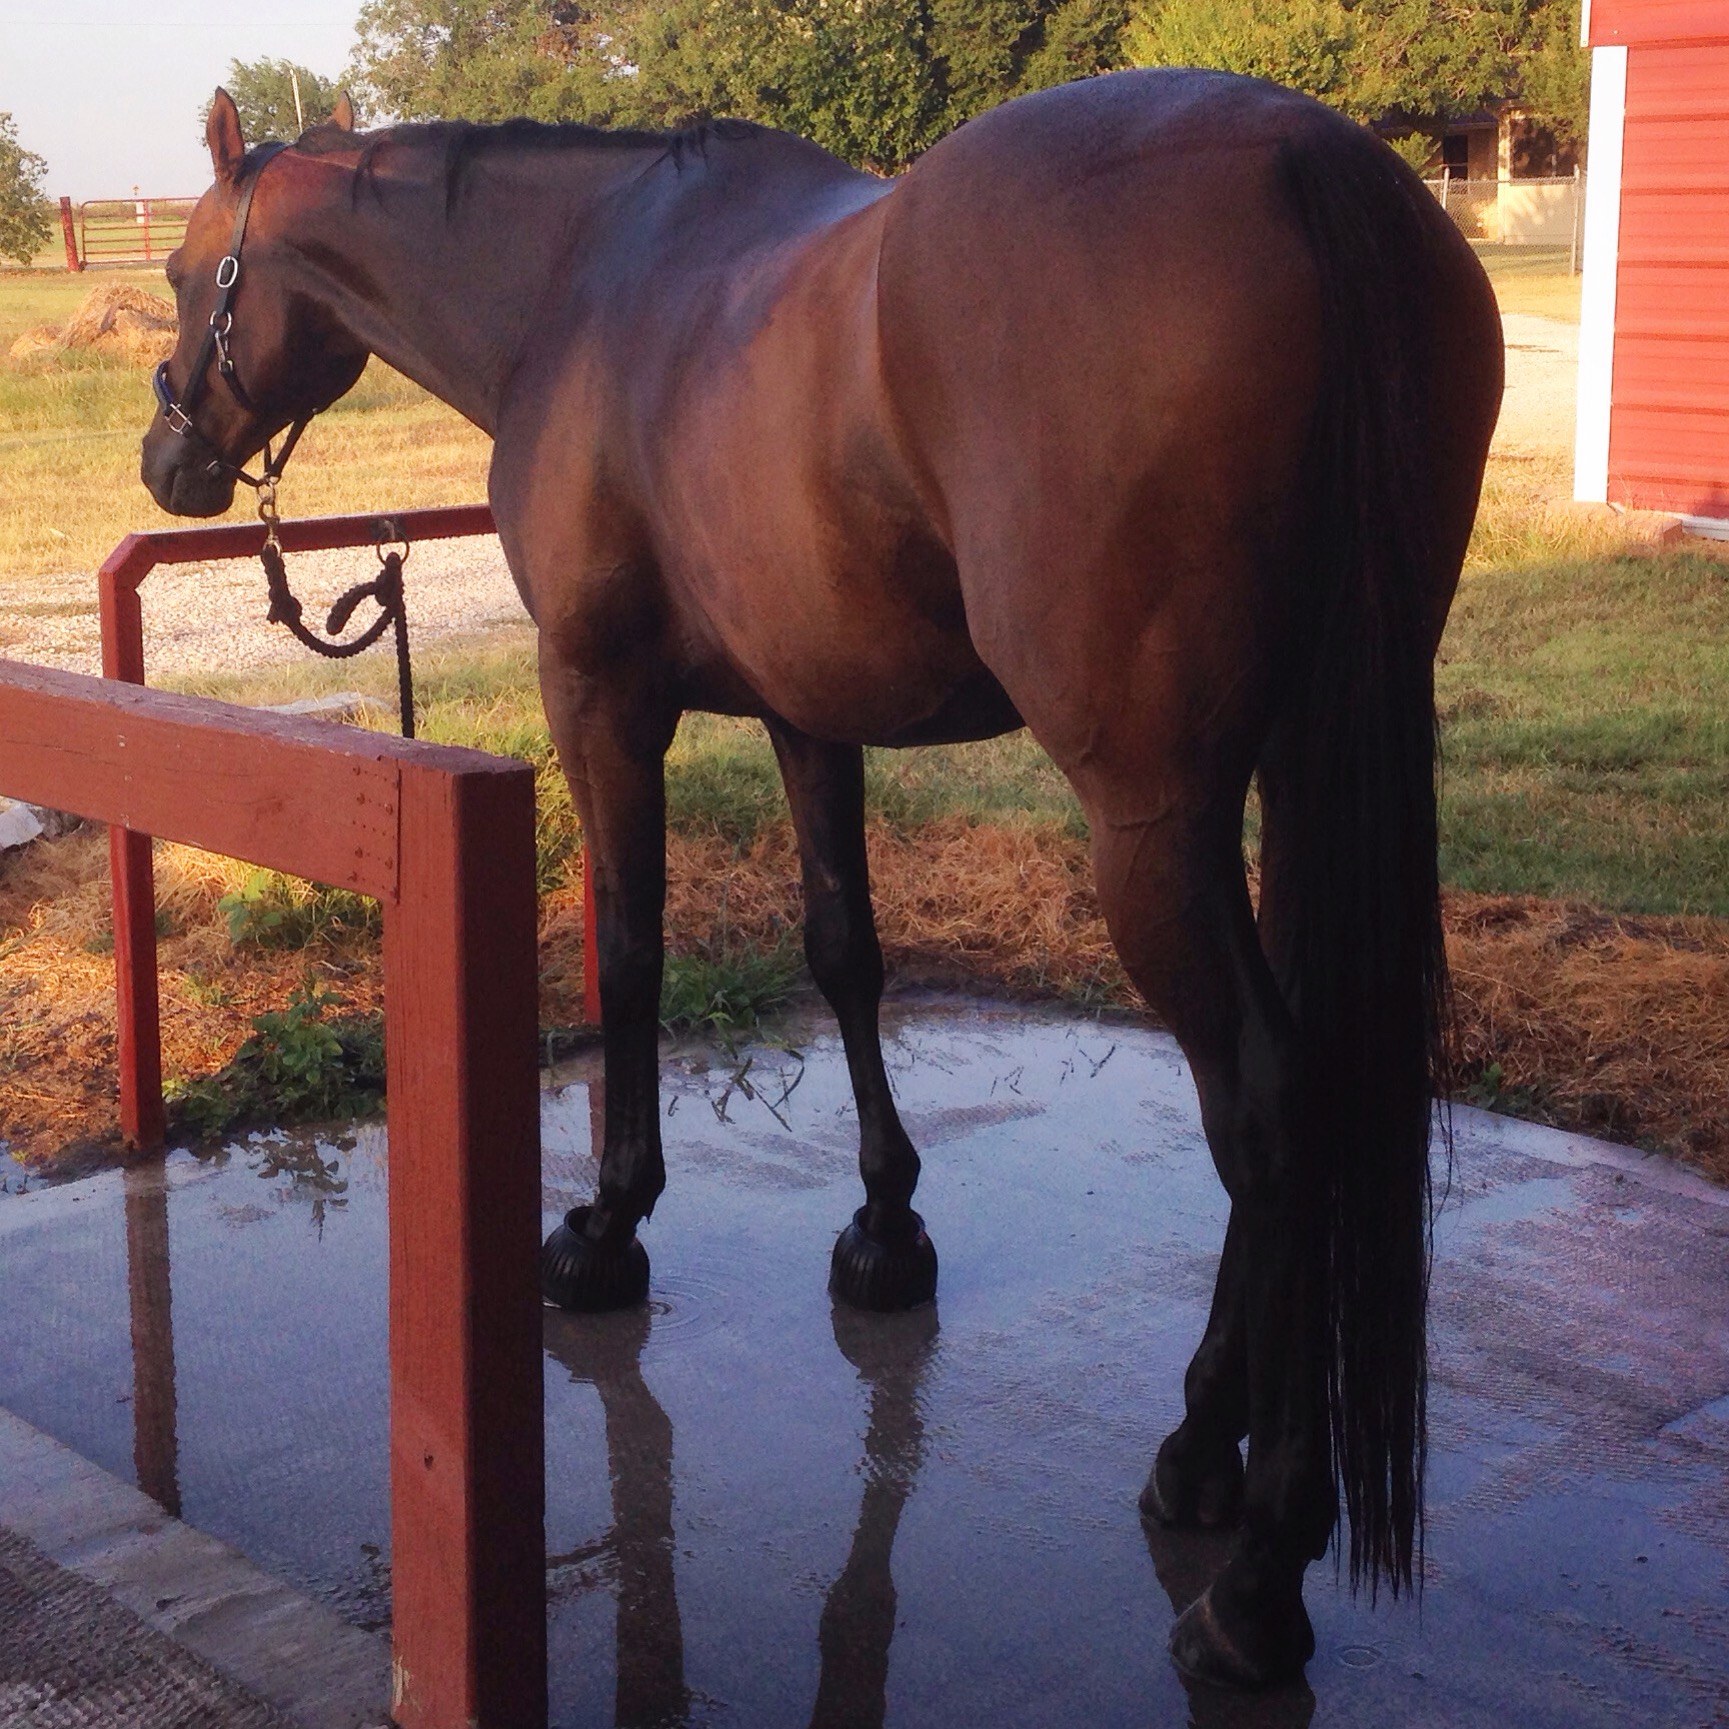
Henry’s tail started out sunbleached, almost touching the ground, and pretty unkempt:

tailmakeoverbefore

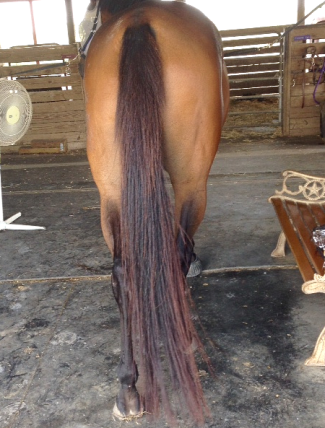
If he was a hunter I would have dyed it and left it alone. If he was a jumper I would have dyed it and banged it a few inches. Since he’s an eventer I dyed it, banged it about 6″, and trimmed the top.

What you’ll need:

  • scissors and/or clippers
  • hair dye (see more about that below)
  • a plastic grocery bag
  • vet wrap
  • clothes you don’t mind getting trashed

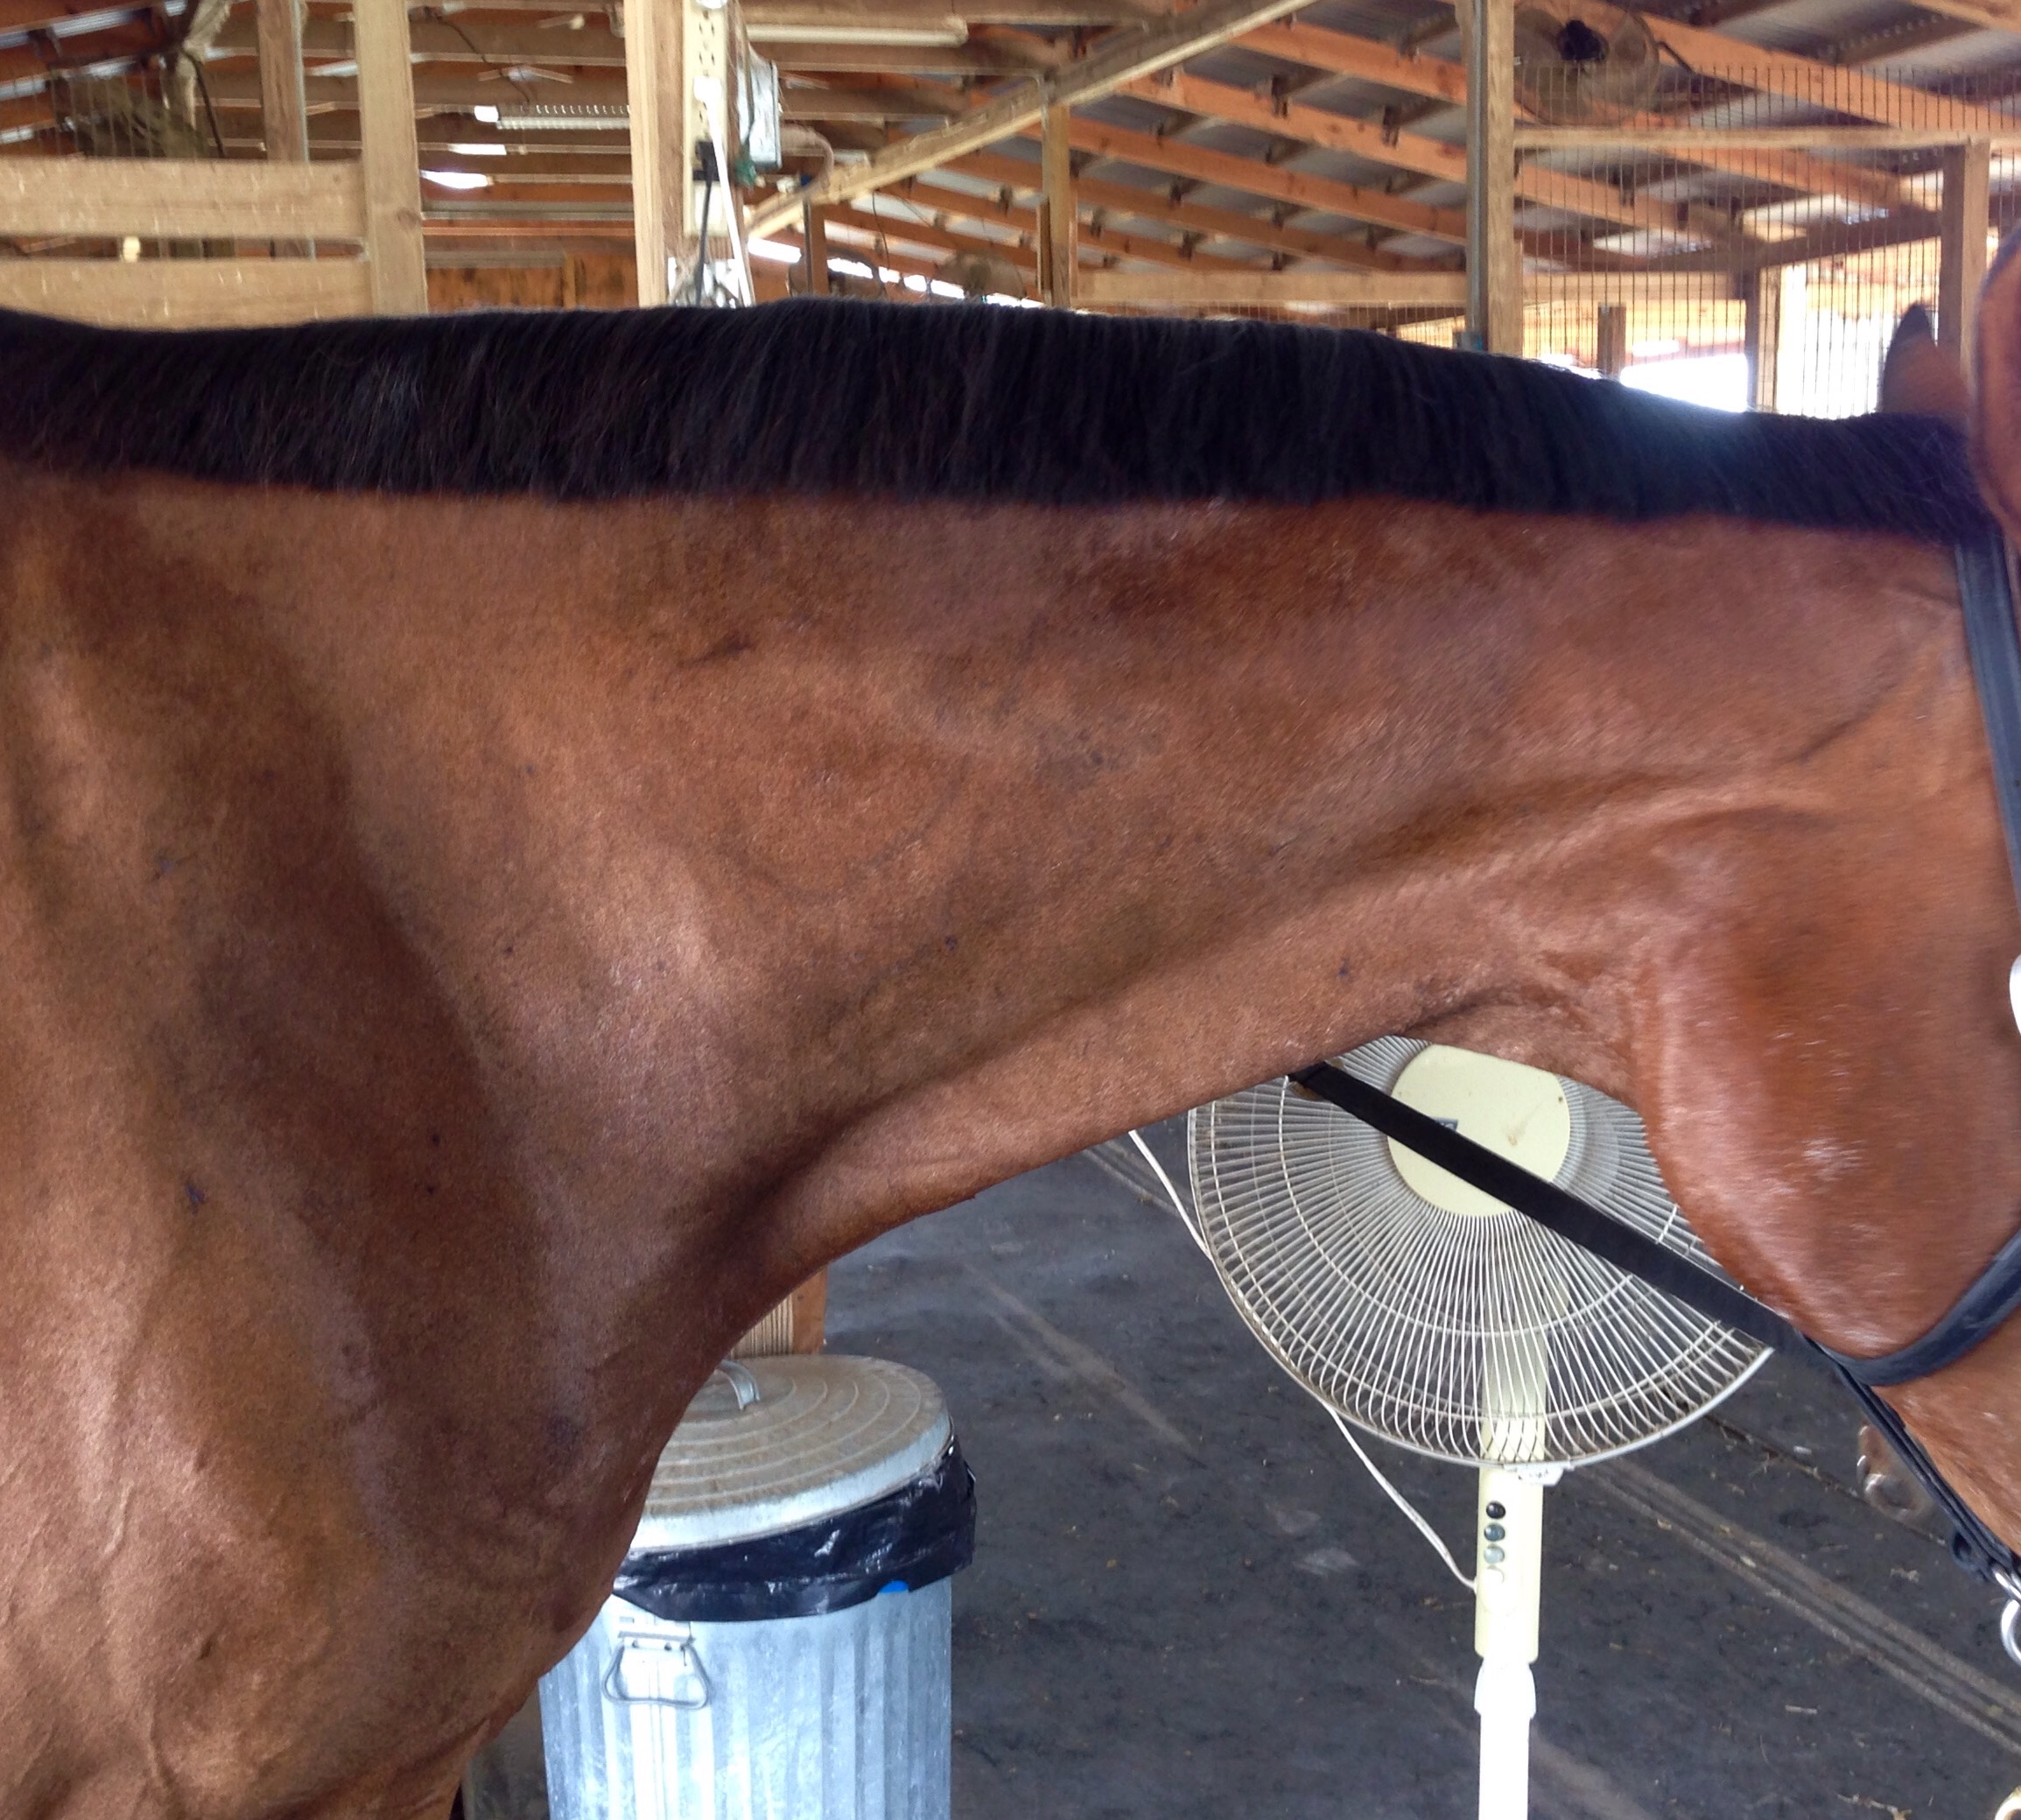
I started off by trimming the top of his tail. There are a lot of ways to do this, my method of choice just being one of many, but it’s the one I’m most comfortable with and it works for me. A lot of people swear that pulling a tail is the only way to go – I’m not one of them. I will never pull a horse’s tail. So that leaves either the scissor method or the clipper method. I feel like I have a little more control with clippers, so that’s what I use. How far down the tail you go is up to you – some go quite a ways down the tail bone, but I personally just go the point of the rump, which ends up being about 6 inches. I pretty much do exactly what’s shown in the video linked above, making sure to go slow and be very deliberate about what I’m shaving off. Remember – you’re only trimming the hair on the sides, never ever ever the hair on the top.

tailmakeoverclipped
Bobby cameo

With that done, it’s time to dye. You could bang it first if you wanted to, but I prefer to do it afterward when the tail is totally detangled and brushed out so you get a tidier cut.

Which hair dye to use has a lot to do with personal preference. My favorite is Clairol, either in Natural Darkest Brown or Natural Soft Black. If you get a very dark, blue-black color it will look a bit TOO dark and unnatural. Some people prefer to use dye specifically formulated for ethnic hair, but I’ve never had a problem with the Clairol taking and holding well, and it’s easy to find, so I’ve just stuck with it.

When you’re dying a tail, make sure that you’re either wearing black or something you don’t mind getting dye all over. Maybe other people out there are neater than I, but it’s inevitable that I get some on myself somewhere. Usually several somewheres. Also – fly spray your horse first. The last thing you want when you’re trying to dye a tail is to have them trying to fling it around all over the place.

Before I get started I put a nice generous coating of conditioner (Vaseline or something similar would work too, but I just use some of the conditioner that comes in the dye kit) on the sides of the rump near where the tail sits and above the dock. You don’t want any dye seeping onto the hair on the rump and making dark spots. If your horse has white on it’s hind legs and you don’t trust yourself to be tidy with the dye (I wouldn’t), put a layer of conditioner on those too.

tailmakeoverconditioner

This is what I call The Point of No Return. Once you start putting dye on the tail you can’t let go of it until it’s bagged. So before you start, make sure your hair is tied back out of your face and make sure you have all of your supplies handy. Put on the gloves included with the dye kit, follow the instructions for mixing, and apply the dye to the tail. I typically start at the top and work my way down so that I have more control over the tail as it gets coated (you DO NOT want the horse getting its tail loose from your grasp and whacking you in the face or itself in the body with a tail that is covered in dye!). This is a pretty simple process, just do your best to get full coverage. You can always go back later and touch it up.

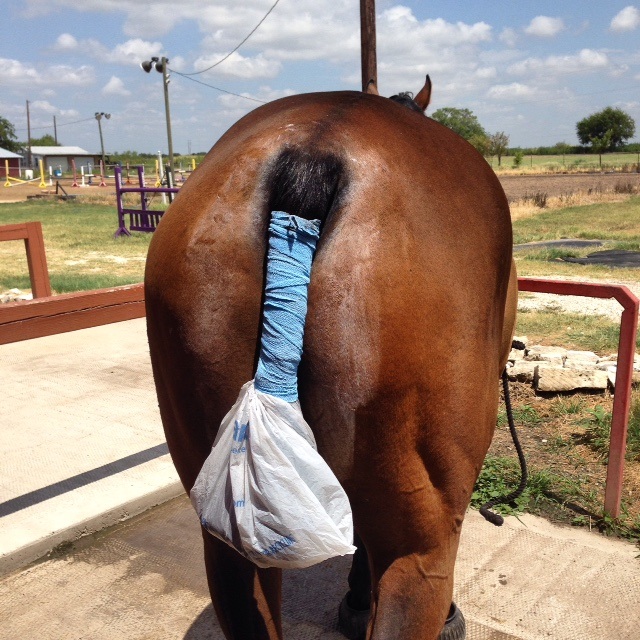
When you’re finished applying the dye, it’s time to wrap up the tail. Before you start any of this, make sure your horse is okay with a plastic bag on it’s butt. None of mine have ever minded, but ya know… I’d feel bad if one of y’all died while dying. Take the bottom part of the tail and shove it into the plastic bag, tying a secure double knot at the top around the tail bone.

tailmakeoverbagged

Some just leave it like this while the dye sets but I like for it to be extra secure, so I also take a roll of vet wrap and wrap over the knotted part of the bag, then all the way up the tail. That helps keep everything in place even if the horse starts swishing.

tailmakeoverwrapped

Let the dye set for however long it says in the instructions. I personally tend to err on the side of too long as opposed to not long enough. Usually that ends up being the perfect amount of time to pull/trim the mane, clip the fetlocks and bridlepath, and give Instagram a quick perusal.

After it has set, take all the wrappings out and rinse the tail until the water runs clear. Some people like to shampoo at this stage – I do not. I usually don’t shampoo for at least a few days after, but I’m not sure that it actually matters, it’s just how I do things. I rinse the tail and apply a good liberal coating of the conditioner that came in the dye kit, using the opportunity to work out all the knots and tangles with my fingers. Then I give it another good rinse, double check for any missed spots, and let it dry. Keep whatever left over dye you have and you can use it over the next couple days if you need to touch up anything… sometimes it’s hard to see missed spots until it’s all dry.

tailmakeoverdry
Henry considers sitting in a chair while he dries, and we witness yet another Bobby cameo. Proof that he’s stalking me.

Once it’s dry it’s time to bang. Make sure everything is totally brushed out first, and then figure out how short you want to go. Typically if you have a horse that is built a little downhill (like mine) or tends to travel a bit on the forehand (like mine), you want to keep it a touch longer. A longer tail helps balance out a slightly front-heavy horse… or so they say. I’ll go with it. You also want to consider how high your horse’s natural tail carriage is.

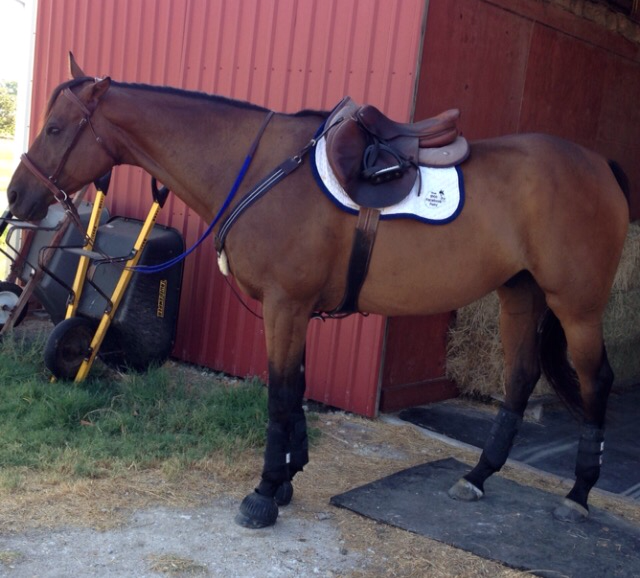
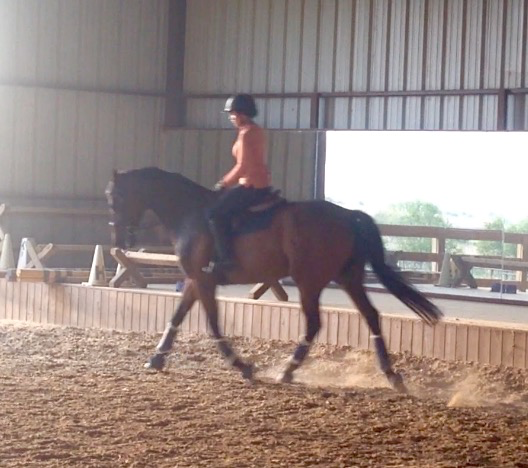
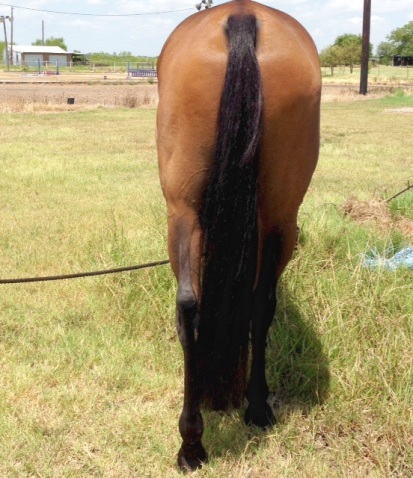
My particular horse is pretty busy with his tail and tends to carry it a little bit “up”, so if I banged his tail at mid-cannon it would look very short when he was in motion. With all of that in mind, I banged his just above the fetlock, so that when he’s in motion it falls about mid-cannon. The finished product looks like this:

tailmakeoverfinish

As I said in the beginning, this is just my particular process that I’ve developed over the years after a lot of trial and error. Feel free to experiment and use/do whatever works best for you, but hopefully this helps get you started!

Growing Pains

Henry is the one growing, and it’s causing my wallet a lot of pain.

As many of you might recall, Henry lost quite a bit of weight last year at our previous barn, which is what prompted the move to our current place.

so narrow

Since the move he’s really blossomed, putting on a ton of weight and muscle. His girth is 5 holes tighter and he’s rounded out so much that’s he’s starting to look like an applebooty. I’m pretty thrilled, because he looks and feels amazing and at this point I think his condition is perfect. Of course, there are other things impacted by the massive change in condition. It started a couple weeks ago when I went to put on his fancy PS of Sweden breastplate and had to basically crush his windpipe to clip it across his chest. A month prior I had to let it out several holes but this time there were no more holes left. Crap, he’s outgrown his cob. I guess that makes sense, since his chest has pretty much doubled in size from when I bought it. So I ordered a full, pulled out the backup breastplate to use in the mean time, grumbled a little, and got over it.

Backup breastplate and derrrrpppp

Then we had a couple of dressage rides in a row where he really tensed up any time I sat the trot and had some icky canter work. After the second bad ride I tossed my beloved Devoucoux up on him to check the fit and wow… there’s no denying it doesn’t fit at all anymore. The hollows that he used to have on either side of his wither are gone, and he’s significantly flatter from side to side across his back. My jumping saddle, which I was having to pad up six ways to Sunday before, is a pretty perfect fit now. So… at least there’s that. Because CWD = ❤ Unfortunately there is no denying that the Devoucoux is definitely pinching and sitting funny, and I can’t ride him in it anymore. Cue me feeling really really stupid for not thinking to check that before now.

Here we are a month before AEC and I’m basically dressage saddle-less. So now what? I can have the Dev repaneled, but it’s $900 and I don’t particularly trust them to get it done right or in a timely manner. The only viable option for me is to sell it and then try to find something else. That pains me greatly because I love the hell out of that saddle for me, but Henry has filled out in such a way that there’s just no making it work for him. I took pictures of it and officially listed it for sale last weekend. I’m hoping that it sells before AEC and that several vendors show up there with used saddles for me to try. But for now… it looks like we’re doing all our dressage work in my super forward CWD.

which looks like this

Henry is not allowed to change shape ever again after this, and every horse after him must be built the same. Saddle shopping is the worst. I have no idea what I want, no idea what will work for him, no idea what will work for me, and nowhere closeby that has lots of consignment saddles I can happily trial my way through. Ugh.

Weekend recap: Rainbow Terrors and Makeovers

First I need y’all to understand the circumstances that this post is being written under, so that if it doesn’t make any sense I have a built in excuse. Quinn has chosen me as His Human, and as such my life apparently now revolves around him. It’s hard to type around fat corgi feet.

Next guest blogger?

Friday was pretty lovely, mostly because lots of good food was involved. Good food is the gold standard. For dinner we went to a great ramen restaurant, then tried out a vegan ice cream place. I know what you’re thinking “Ew, vegan ice cream. Why would you ruin ice cream that way? That’s just wrong.”. That’s what I was thinking anyway. But I was 100% wrong because that place was awesome. The ice cream was good, period… vegan or not. We got something called the Rainbow Terror – two scoops of ice cream (we opted for chocolate and mint chip) – covered with peanut butter magic shell, sprinkles, toasted marshmallows, gummy worms, crushed oreos, and edible glitter. Yes I said edible glitter. I couldn’t get a picture to quite capture just how sparkly this thing was, but it made my little unicorn heart go pitter patter.

They also had cool stickers.

And a sign that I really wanted to steal for my house.

We will definitely be back for more Rainbow Terror, or perhaps a Glitter Beast next time.

Saturday was designated as spa day for Henry. It’s been a couple months since I did his mane, and I’m just going to braid into regular buttons for Corona next weekend, so it had to lose a few inches.

the Before Dinosaur
After – tamed dinosaur

I also finally did his tail. I’ve been saying all year that if we got to AEC he would’ve officially earned a real eventer tail, so that’s what he got. The top got trimmed up, it got dyed back to a normal color, and I banged a good 6″ off the bottom. It now hits solidly mid-cannon when he’s in motion. Sorry hunter folk, but he’s all kinds of eventer-proper now.

Kinda wish I’d done his tail like this from the get-go, his butt looks so much more shapely.

Sundays have become our long-ride days, so we started out with 20 minutes of trotting in the ring and then headed out down the road for some exploring. I’m trying to get at least an hour in, and it can get a little boring. We cantered up and down a stretch beside the road a few times and then meandered around the backroads. I stumbled across this fantastic little patch of nothingness in between corn fields and it has awesome footing. Given how dry it’s been lately it’s become more and more difficult to find fields that aren’t getting super cracked and dangerous, but this one has survived really well. New trot and canter sets field? Yes please.

It also had a little wash out that made a perfect wannabe “sunken road”… hop down, one stride, hop back up. Henry thought it was great fun and tried to celebrate with a dolphinesque victory gallop. He thought it was less fun when I pointed him at an abandoned twin mattress on the side of the road on the way home, but jump over it he did. Cuz he’s an eventer and all that, and none of my bullshit surprises him anymore.

Tonight we have a dressage lesson and then mostly light work the rest of the week before we leave for Corona on Friday!

Jog Outfits (aka the fun part)

I have to admit, it didn’t really occur to me until I wrote yesterday’s post that doing a three day means that there are jog-ups. And jog-ups mean that there are jog outfits. We’ll ignore the fact that they say casual attire permitted and plan spiffy jog outfits anyway. Because this is my Rolex, and no one can make me jog up in barn attire at my Rolex.

Looking back through other N3DE’s, everyone’s jog-up attire seems to fall somewhere between “this is what I slept in” and “I was outfitted by the british monarchy”. Fist bumps to those who see this occasion the same way I do. If I’m braiding my horse, I’m not walking out looking like a hobo. That’s all I’m saying. Plus pictures. Everyone knows the pictures are the most important part. And everyone also knows that if you look supafly, you look more competent. I would love to fool people into thinking I’m competent, even if only for a few minutes.

Although eventers aren’t really known for being fashion mavens, the jogs always seem to be a whole ‘nother world entirely. Everyone seems to have a style that they prefer, ranging from

sleek and professional

to conservative

to dressy

to BRAVE (all white AND heels!)

to suicidal

to a pop of color

to badass

to a bold print

to avant garde

to looking like you’re definitely sponsored by Dubarry

to channeling Sharon White because you effin LOVE orange

to a human kite

Wait… nix that last one. Don’t do that.

Obviously there is a wide range of styles, from dresses to pants, plain to colorful, boots to heels, bold to conservative. I know what I like, but what’s your preference? This is the fun part.

As for me, rest assured that navy and yellow will be involved. There will be no dresses and no heels. And no, I am not afraid of yellow pants. Or yellow blazers.

jogoutfit1 jogoutfit2


The Long Format? Sign me up.

As I briefly mentioned in my post on Monday, I’ve decided on a new “big” goal for next year. Because it’s fun to set big goals really far in advance. Just like I did last year with AEC. Not nerve-wracking at all. Nope. Not even a little.

I have always been a fan of long format eventing, or as some people now call it, “classic format”. When I was first introduced to eventing in the early 2000’s, things were just starting to change over to the short format. My one trip to Rolex in 2000 was when they still were still running it the “Classic” way, and I still remember it vividly.

For those who don’t remember or don’t follow eventing, the major difference is that the long format has 4 phases to Cross Country day (called Endurance day) instead of just one. Phase A is Roads and Tracks – basically a w/t/c warm-up of a certain length of time/distance. Phase B is steeplechase – galloping at speed over brush fences. Phase C is more roads and tracks – to cool down from Phase B. And then finally Phase D is cross country itself. Phases A, B, and C are concurrent but there’s a 10 minute hold in the vet box – from which your horse must be cleared as being fit to continue – before Phase D.

vet box action

While the long format no longer exists at the upper levels, USEA (good ol’ USEA oh how I love thee) started a program in 2012 called the Classic Series. This series allows show organizers to offer long format 3 day events at the lower levels – from BN through Preliminary. Right now there is only one Prelim level 3 Day (in Kentucky) and one BN level 3 Day (in South Carolina), but Novice and Training level are more popular. Surely you guys can see where this is going?

I sat down and looked at the schedule to see who offers a Novice 3DE, and the closest ones are Arizona (Coconino) and Colorado (Colorado Horse Park). Both courses look very straightforward and do-able. Coconino is a 15 hour drive and Colorado is a 13 hour drive – not much difference. They’re both in the summer, just a few weeks apart. Being that Henry is not a hot weather horse, the determining factor was weather. Coconino is in Flagstaff, which is the high desert, so the average high temp for July is 80 and the average low is 50. The lows are cold enough to where I’d have to bring his sheet! IN JULY! What do I say to that? I say SIGN ME THE HELL UP. (I mean really, look at the videos from Coconino and tell me you don’t want to spend a week in the pine trees)

These Classic Series events are pretty damn cool. They set it up such that it’s more like half clinic/half competition. You have meetings where they teach you how to properly present your horse for the jog-up, what to do in the vet box, and steeplechase practice where they help you learn how to ride at speed over fences. You have in-barn inspections and jog-ups. You have 3 separate distinct days of competition, culminating in a show jumping day run in reverse order of standing. You have a whole ‘nother special dressage test to learn (2012 USEA Novice 3-Day Event Test, I’ve got my eye on you).

And that’s not to mention all the prep. The introduction of 3 more phases on XC day creates a unique challenge in itself. The preparation and fitness required for the N3DE are no where near the 4* level of days past, but it’s certainly more than an average Novice level horse would need. The USEA guidelines for N3DE endurance day look like this:

ENDURANCE SPECIFICATIONS – NOVICE

Phase A: Time: 10-16 minutes
Distance: 2200-3520 meters
Speed: 220 mpm (about a medium trot)

Phase B: Time: 2 or 3 minutes
Distance: 940-1410 meters
Speed: 470 mpm (between T and P XC pace – true gallop but not super forward)
Efforts: 3-6
Brush Height: 3’3”
Solid Height: 2’9”

Phase C: Time: 15-25 minutes
Distance: 2400-5500 meters
Speed: 160 or 220 mpm

Phase D: Distance: 1600-2200 meters
Speed: 400 mpm
Efforts: 16-22

Steeplechase on the racetrack at Coconino

Until I get there I won’t know what the exact distances and times are, so I have to just prepare for the max. Can my horse trot for 16 minutes straight, gallop and jump for 3, trot another 25 minutes straight, take a 10 minute break, run XC, and still feel fresh afterward? Not right now, no. As you can see, that’s more work than a Novice horse would typically be prepared to do in one day (unless you’re one of those people that does seriously long and intense warm-ups), especially a day sandwiched between a dressage test/steeplechase practice day and show jumping day. Conditioning is the name of the game and the name of the game is conditioning. The idea isn’t just to survive – the idea is to finish endurance day with a sound, happy, healthy, energetic horse that will pass the jog-up the next day and be raring to go for stadium. They should be fit enough that endurance day is easy.

Interval work, trot sets, and gallop days have already been a part of our repertoire for a while now. Lately I started adding in long trot days (you don’t realize how many walk breaks you normally take until you set out with the intent of trotting for 20 minutes straight) and longer walk days (seriously, try the snoozefest that is known as walking for an hour) as well… we usually have two “conditioning days” per week. Really we won’t start gearing up for Coconino until late winter, but I like for Henry’s base level of fitness to be higher than what he really needs, and always want him to finish XC looking like he can go around again. I truly believe that a fit horse is a sound horse is a capable horse is a confident horse… tired, fat, unfit horses are more susceptible to injury and error. I think the extra miles and time and work will be good for both of us. There will be schedules to make, legs to ice, hooves to pack, and lots of learning to be done.

So there you go. The goal is officially out there on the interwebs now. We’ve got 11 months to plan and get ourselves qualified (just need 3 more completions at Novice) and then get more fit and ready to go. And you know what else long format means? Super important things like jog outfits.

longformatclub

***NOTE: if you’re interested in supporting the Classic Series and long format eventing, visit this site and consider making a donation. All proceeds go to the organizers of classic format events, to help keep them running!